Introduction of Sacchetti Pasta Recipe in 2024
Welcome to the delightful world of Sacchetti Pasta Recipe in 2024! This charming, pouch-shaped pasta is perfect for capturing rich and creamy sauces. Inspired by my Italian travels, this recipe blends traditional techniques with modern twists. Follow along to create a mouthwatering dish that will impress your family and friends. Dive in and discover how to make Sacchetti Pasta from scratch!
Table of Contents
Ingredients for Sacchetti Pasta Recipe in 2024
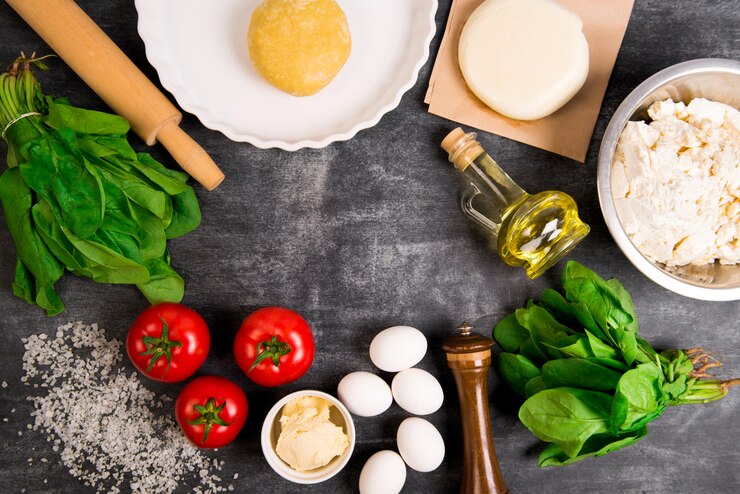
To make the perfect Sacchetti Pasta, you’ll need the following ingredients. These can be easily found in your local grocery store or specialty food market. Make sure to gather everything before you start cooking to ensure a smooth process.
For the Dough:
- 2 cups all-purpose flour: Provides the base for your pasta dough.
- 3 large eggs: Adds richness and helps bind the dough.
- 1 tablespoon olive oil: Enhances the dough’s elasticity and flavor.
- 1/2 teaspoon salt: Essential for seasoning the dough.
For the Filling:
- 1 cup ricotta cheese: Creamy and mild, this is the primary filling ingredient.
- 1/2 cup grated Parmesan cheese: Adds a nutty, salty flavor to the filling.
- 1 cup fresh spinach, chopped: Adds color, flavor, and a healthy touch.
- 1 teaspoon lemon zest: Provides a fresh, citrusy note.
- 1 tablespoon fresh tarragon, chopped: Adds a subtle anise-like flavor.
- Salt and pepper to taste: For seasoning the filling.
For the Sauce (Optional):
- 1/4 cup butter: Creates a rich base for the sauce.
- 1/2 cup heavy cream: Adds creaminess to the sauce.
- 1/2 cup grated Parmesan cheese: For additional flavor and thickness.
- 1 clove garlic, minced: Adds a fragrant, savory note.
- Salt and pepper to taste: To balance the flavors.
Additional Ingredients:
- Semolina flour or cornmeal: For dusting, to prevent the dough from sticking.
- Water: For sealing the pasta edges.
- Fresh basil leaves: For garnish and an added burst of flavor.
- Extra Parmesan cheese: For sprinkling over the finished dish.
With these ingredients in hand, you’re ready to embark on the journey of making homemade Sacchetti Pasta. The combination of these elements will create a delicious, memorable dish that showcases the beauty of Italian cuisine.
Method Instructions
Creating Sacchetti Pasta from scratch is a rewarding process that involves several steps. Follow these detailed instructions to ensure you make a perfect batch.
1. Wash Your Hands:
Start by thoroughly washing your hands to maintain hygiene throughout the cooking process.
2. Prepare the Dough:
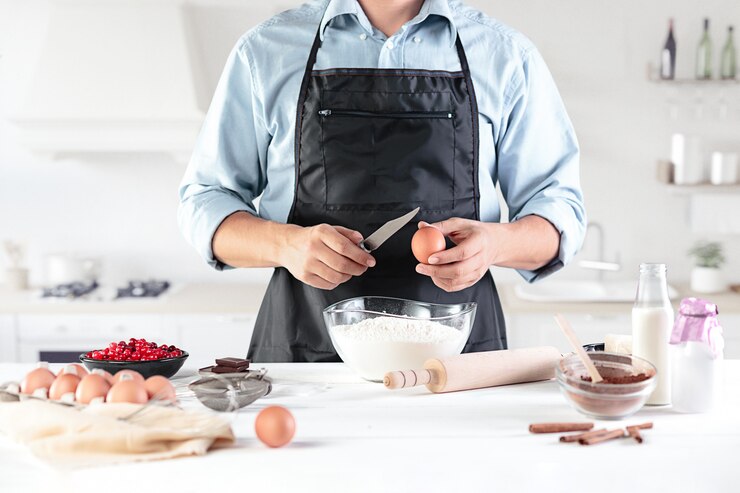
- Combine Ingredients: On a clean work surface, make a mound with the flour and create a well in the center. Crack the eggs into the well, add olive oil, and sprinkle in the salt.
- Mix: Use a fork to gently beat the eggs and gradually incorporate the flour from the edges of the well until a shaggy dough forms.
- Form Dough: Use your hands to bring the dough together, incorporating all the flour. If the dough is too dry, add a small amount of water, a teaspoon at a time.
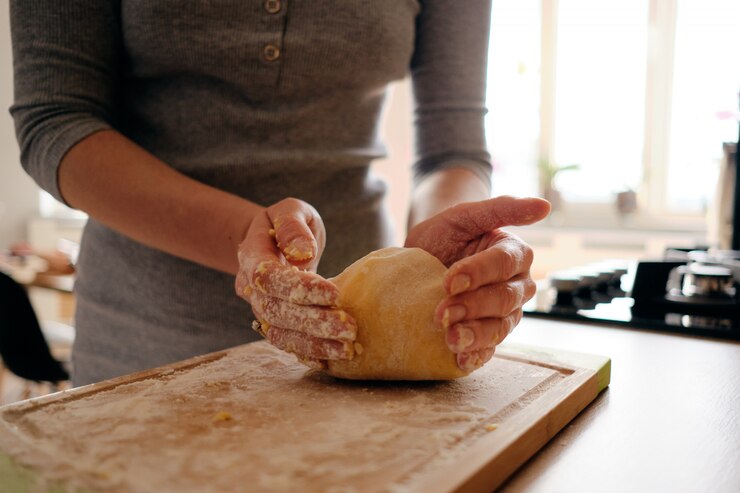
3. Knead the Dough:
- Knead: Knead the dough on a lightly floured surface for about 10 minutes until it becomes smooth and elastic. The dough should be firm but pliable.
- Rest: Shape the dough into a ball, wrap it in plastic wrap, and let it rest at room temperature for at least 30 minutes. This resting period allows the gluten to relax, making the dough easier to roll out.
4. Rest the Dough:
Allow the dough to rest as mentioned above. This step is crucial for achieving the right texture.
5. Spread Out the Dough:
- Roll: After resting, divide the dough into smaller portions. Roll out each portion using a rolling pin or a pasta machine to a thickness of about 1/16 inch (1.5 mm). Keep the remaining dough covered to prevent it from drying out.
6. Cut Out the Sacchetti:
- Cut Squares: Cut the rolled-out dough into squares approximately 2 inches (5 cm) on each side. These squares will be used to form the sacchetti.
7. Shape the Sacchetti:
- Add Filling: Place a small spoonful of the prepared filling (ricotta mixture) in the center of each dough square.
- Seal: Lightly brush the edges of the dough squares with water. Gather the corners of each square together and pinch tightly to form a pouch, making sure the filling is sealed inside.
8. Cook the Sacchetti:
- Boil Water: Bring a large pot of salted water to a boil.
- Cook: Carefully drop the sacchetti into the boiling water. Cook for 3-5 minutes or until they float to the surface and are tender. Avoid overcrowding the pot; cook in batches if necessary.
- Drain: Use a slotted spoon to remove the sacchetti from the water and transfer them to a serving dish.
9. Serve and Enjoy:
- Prepare Sauce (Optional): While the sacchetti are cooking, prepare the sauce by melting butter in a pan over medium heat. Add minced garlic and cook until fragrant. Stir in heavy cream and grated Parmesan cheese, and cook until the sauce thickens.
- Toss and Serve: Gently toss the cooked sacchetti in the sauce until well coated. Serve immediately, garnished with fresh basil leaves and extra Parmesan cheese.

By following these steps, you’ll create a delightful and authentic Sacchetti Pasta dish that will impress your guests and satisfy your taste buds. Enjoy your homemade creation!
Serving Suggestions
Once you’ve prepared your delicious Sacchetti Pasta, consider these serving suggestions to enhance your dining experience:
Garnish:
Sprinkle freshly chopped herbs like basil or parsley over the pasta for a burst of color and added flavor.
Cheese:
Serve with additional grated Parmesan cheese on the side, allowing guests to sprinkle as much as they desire.
Side Salad:
Pair the Sacchetti Pasta with a fresh green salad dressed lightly with balsamic vinaigrette or lemon juice to complement the richness of the pasta.
Bread:
Serve crusty Italian bread or garlic breadsticks on the side to soak up any leftover sauce.
Wine Pairing:
Pair with a light-bodied white wine such as Pinot Grigio or Sauvignon Blanc, or a medium-bodied red wine like Chianti or Sangiovese.
Presentation:
Arrange the sacchetti neatly on individual plates or in a large serving bowl, ensuring each pouch is showcased beautifully.
Variations:
Experiment with different fillings and sauces to customize the dish to your taste preferences or dietary needs.
Family Style:
Serve the Sacchetti Pasta family-style, allowing everyone to help themselves directly from the serving dish, creating a convivial dining experience.
By considering these serving suggestions, you can elevate your Sacchetti Pasta meal into a memorable dining occasion that delights both the palate and the senses.
Tips and Tricks
Tips for Perfect Dough:
Use Fresh Ingredients:
Always use the freshest eggs and high-quality flour for the best texture and flavor.
Room Temperature Eggs:
Bring your eggs to room temperature before incorporating them into the dough. This helps create a smoother, more pliable dough.
Resting the Dough:
Allow the dough to rest for at least 30 minutes. This relaxes the gluten and makes the dough easier to roll out.
Dusting Flour:
Keep some extra flour handy for dusting your work surface and rolling pin. This prevents the dough from sticking.
Tips for Rolling and Shaping:
Uniform Thickness:
Roll out the dough to an even thickness of about 1/16 inch (1.5 mm). This ensures consistent cooking.
Keep Dough Covered:
Cover the portions of dough you are not working on with a damp cloth or plastic wrap to prevent them from drying out.
Proper Sealing:
Ensure the edges of the sacchetti are sealed well to prevent the filling from leaking out during cooking. Use a little water to help the edges stick together if needed.
Tips for Filling:
Well-Mixed Filling:
Make sure your filling is well-mixed and smooth. This helps in even distribution inside the sacchetti.
Avoid Overfilling:
Use just enough filling to create a small mound in the center of each dough square. Overfilling can make it difficult to seal the sacchetti properly.
Chill the Filling:
If your filling is too soft, chill it in the refrigerator for 10-15 minutes to make it easier to work with.
Tips for Cooking:
Boiling Water:
Make sure the water is at a rolling boil before adding the sacchetti. This helps them cook evenly and prevents them from becoming soggy.
Cooking in Batches:
Avoid overcrowding the pot. Cook the sacchetti in batches to ensure they have enough space to move around and cook evenly.
Gentle Stirring:
Stir the pasta gently with a slotted spoon to prevent the delicate pouches from breaking apart.
Tips for Serving:
Warm Plates:
Serve the pasta on warm plates to keep it at the perfect temperature for longer.
Fresh Garnishes:
Add fresh herbs or a drizzle of high-quality olive oil just before serving to enhance the flavors.
Cheese Toppings:
Offer freshly grated Parmesan cheese on the side for guests to add to their liking.
Frequently Asked Questions for Sacchetti Pasta Recipe in 2024
What is Sacchetti Pasta?
- Sacchetti Pasta, which translates to “little bags” in Italian, is a type of pasta that resembles small pouches or packets. It is typically filled with a savory mixture and sealed to create a unique shape that holds sauce well.

How did Sacchetti Pasta come to be?
- Sacchetti Pasta originated in Italy, where pasta artisans developed various shapes and forms to enhance the dining experience. The pouch-like shape of Sacchetti Pasta allows it to hold a variety of fillings, making it a versatile and creative option in Italian cuisine.
How should Sacchetti Pasta be stored?
- Uncooked Sacchetti Pasta can be stored in an airtight container or sealed plastic bag in a cool, dry place. It is best used within a few days of making or purchasing it fresh.
Can I prepare Sacchetti Pasta in advance?
- Yes, you can prepare Sacchetti Pasta in advance. After shaping the pasta pouches, you can refrigerate them on a baking sheet lined with parchment paper. Cook them just before serving for the best texture and taste.
Is it possible to alter the Sacchetti Pasta filling?
- Absolutely! The filling for Sacchetti Pasta can be varied to suit your preferences. Traditional fillings include ricotta cheese with herbs and spices, but you can experiment with different cheeses, vegetables, meats, or seafood to create unique flavor combinations.
Can vegans or vegetarians consume Sacchetti Pasta?
- Yes, Sacchetti Pasta can be adapted to vegan or vegetarian diets. Substitute dairy ingredients like ricotta and Parmesan with plant-based alternatives, and use vegetable-based fillings to create a delicious vegan or vegetarian version of this dish.
These frequently asked questions provide valuable insights into Sacchetti Pasta, helping you appreciate its history, versatility, and preparation methods. Incorporate this knowledge into your cooking experience to create delightful meals that are both flavorful and satisfying.
Conclusion
In conclusion, Sacchetti Pasta offers a delightful blend of tradition and creativity in Italian cuisine. By following the simple yet detailed steps outlined in this article, you can create homemade Sacchetti Pasta that is sure to impress. Whether you choose to stick with classic fillings or experiment with your own variations, the pouch-shaped pasta promises a delicious dining experience for family and friends alike. Embrace the art of pasta-making and enjoy the satisfaction of crafting a dish that not only tastes exquisite but also reflects the heart of Italian culinary craftsmanship. Buon appetito!
Pingback: Freeze Dried Jolly Ranchers Recipe In 2024-top 5 secrets
Pingback: Hawaiian Chow Fun Recipe in 2024 - Top 8 Secrets
Pingback: Philly Cheesesteak Tortellini Pasta Recipe in 2024 - Top 10 Secrets
Pingback: Extruder Pasta Dough Recipe in 2024 - Top 8 Secrets