Introduction of Raw Milk Ice Cream Recipe in 2024
Ice cream is a beloved treat enjoyed by people of all ages, and making it at home allows for a level of customization that store-bought varieties simply can’t match. One way to elevate your homemade ice cream is by using raw milk, which not only adds a rich, creamy texture but also brings numerous health benefits to the table. In this article, we’ll explore the joys of making raw milk ice cream, including a detailed recipe, the benefits of using raw milk, and a nutrient table to help you understand the goodness packed into this delightful dessert.

Table of Contents
The Health Benefits of Raw Milk
Before diving into the recipe, it’s important to understand why raw milk is a fantastic choice for making ice cream.
- Rich in Nutrients: Raw milk is packed with essential nutrients, including vitamins A, D, E, and K, along with a wealth of minerals like calcium, magnesium, and phosphorus. These nutrients are crucial for maintaining healthy bones, teeth, and overall well-being.
- Contains Beneficial Enzymes: Raw milk contains natural enzymes such as lactase, which aids in the digestion of lactose. This can make raw milk easier to digest for those who are lactose intolerant.
- Boosts Immune Function: The presence of beneficial bacteria and immunoglobulins in raw milk helps strengthen the immune system, making it easier for your body to fight off infections.
- Better Taste and Texture: Raw milk’s natural fat content gives ice cream a creamier texture and a richer flavor, making it a more satisfying treat.
Ingredients for Raw Milk Ice Cream
To make raw milk ice cream, you’ll need the following ingredients:
- 2 cups of raw milk: The star of the recipe, raw milk, provides a creamy base rich in nutrients.
- 1 cup of heavy cream: Adds extra creaminess and richness to the ice cream.
- 3/4 cup of organic sugar: Sweetens the ice cream while keeping it natural.
- 4 large egg yolks: Gives the ice cream a smooth, custard-like texture.
- 1 tablespoon of pure vanilla extract: Enhances the flavor with a classic vanilla taste.
- A pinch of sea salt: Balances the sweetness and enhances the overall flavor.
Step-by-Step Instructions
Follow these simple steps to create your own raw milk ice cream at home:
Step 1: Prepare the Ice Cream Base
- Whisk the Egg Yolks and Sugar: In a medium-sized bowl, whisk together the egg yolks and sugar until the mixture is pale and thick. This process helps to dissolve the sugar and incorporates air, which will contribute to the ice cream’s light texture.
- Heat the Raw Milk and Cream: In a saucepan, combine the raw milk and heavy cream. Heat the mixture over medium heat until it begins to steam but doesn’t boil. Stir occasionally to prevent the milk from scorching.
- Temper the Egg Mixture: Slowly pour about 1/2 cup of the warm milk mixture into the egg yolk mixture while whisking continuously. This process, known as tempering, prevents the eggs from curdling by gradually raising their temperature.
- Combine and Cook: Pour the tempered egg mixture back into the saucepan with the remaining milk and cream. Cook the mixture over low heat, stirring constantly, until it thickens enough to coat the back of a spoon. This usually takes about 5-7 minutes.
- Add Vanilla and Salt: Once the mixture has thickened, remove it from the heat and stir in the vanilla extract and a pinch of sea salt. These ingredients enhance the flavor and balance the sweetness of the ice cream.
Step 2: Chilling the Mixture
- Cool the Base: Transfer the mixture to a clean bowl and let it cool to room temperature. To speed up the process, you can place the bowl in an ice bath.
- Chill in the Refrigerator: Once the mixture has cooled, cover the bowl with plastic wrap and refrigerate for at least 4 hours, or preferably overnight. This chilling process allows the flavors to meld and ensures that the ice cream will churn properly.

Step 3: Churn the Ice Cream
- Prepare the Ice Cream Maker: Set up your ice cream maker according to the manufacturer’s instructions. Ensure that the bowl is properly frozen if required.
- Churn the Ice Cream: Pour the chilled mixture into the ice cream maker and churn according to the manufacturer’s instructions, usually for about 20-30 minutes. The ice cream will thicken and take on a creamy consistency.
- Freeze for Firmer Ice Cream: For a soft-serve consistency, you can enjoy the ice cream right away. For a firmer texture, transfer the ice cream to an airtight container and freeze for an additional 2-4 hours.
Step 4: Serve and Enjoy
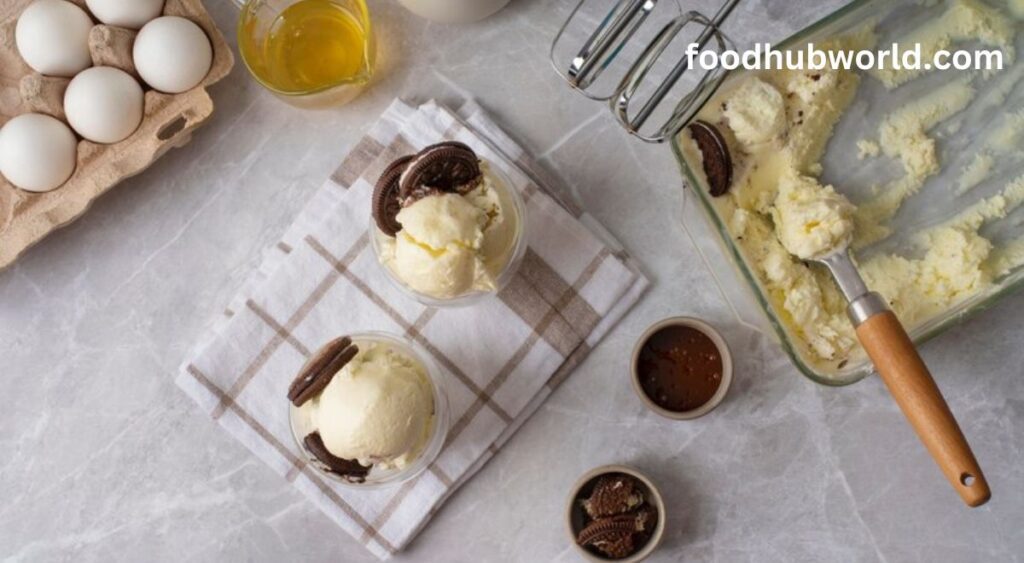
- Scoop and Serve: Once the ice cream has reached your desired consistency, scoop it into bowls or cones. You can also add your favorite toppings, such as fresh fruit, chocolate chips, or nuts.
- Store Leftovers: If you have any leftovers, store them in an airtight container in the freezer. Raw milk ice cream is best enjoyed within a week for optimal flavor and texture.

Nutrient Table for Raw Milk Ice Cream
Below is a nutrient table based on one serving (approximately 1/2 cup) of raw milk ice cream. Please note that these values are approximate and can vary based on the specific ingredients used.
| Nutrient | Amount per Serving |
|---|---|
| Calories | 180 |
| Total Fat | 12g |
| Saturated Fat | 7g |
| Cholesterol | 120mg |
| Sodium | 45mg |
| Total Carbohydrates | 16g |
| Dietary Fiber | 0g |
| Sugars | 15g |
| Protein | 3g |
| Vitamin A | 10% of Daily Value |
| Vitamin D | 6% of Daily Value |
| Calcium | 10% of Daily Value |
| Iron | 2% of Daily Value |
Tips for Making the Perfect Raw Milk Ice Cream
- Use Fresh Ingredients: Since raw milk is unpasteurized, it’s essential to use the freshest milk possible to ensure the best flavor and safety. Always source your raw milk from a trusted supplier.
- Experiment with Flavors: While vanilla is a classic choice, don’t be afraid to experiment with different flavors. You can add natural flavorings such as cocoa powder, fruit purees, or even a splash of coffee for a unique twist.
- Consider Your Ice Cream Maker: Different ice cream makers can yield varying results. If you’re new to making ice cream, consider starting with a basic model and upgrading as you become more confident in your skills.
- Monitor the Temperature: Avoid overheating the milk mixture, as this can cause the proteins to denature and result in a grainy texture. Keep the heat low and stir continuously for a smooth custard base.
- Add Mix-Ins Carefully: If you want to add mix-ins like chocolate chips, nuts, or fruit, do so during the last few minutes of churning. This ensures they are evenly distributed without sinking to the bottom.
FAQs
Why did they stop making ice milk ice cream?
Ice milk was phased out due to changes in labeling regulations and the introduction of low-fat ice cream, which offered similar taste and texture but with better marketing appeal.
Does raw milk still have cream?
Yes, raw milk still has cream. The cream naturally rises to the top in raw milk because it hasn’t been homogenized, which is a process that evenly distributes the fat.
What kind of milk is best for ice cream?
Whole milk is best for ice cream because its higher fat content creates a creamy texture and rich flavor, essential for making high-quality ice cream.

Conclusion
Making raw milk ice cream at home is a rewarding experience that combines the joy of cooking with the benefits of raw, natural ingredients. By following this recipe, you’ll create a delicious and creamy dessert that not only satisfies your sweet tooth but also provides valuable nutrients.
By using raw milk, you’re not only enhancing the flavor and texture of your ice cream but also contributing to your overall health and well-being. So, grab your ingredients, fire up the ice cream maker, and treat yourself to a bowl of homemade raw milk ice cream today!
Pingback: Kulfi Recipe Without Condensed Milk in 2024 - Top 3 Secrets
Pingback: Lavender Cold Foam Recipe in 2024 - Top 5 Secrets